- Welcome to RetroLinear Knowledge Base.

Recent posts
Pages1
#1
Wurlitzer Electric Piano's / SUPPORT: Amplifier stuttering ...
Last post by RetroLinear - Dec 16, 2024, 07:54 PMSymptom: Amplifier stuttering with sound cutting in and out thru speakers only. Lineout is clean and operating.
Notes:
What you are experiencing sounds like the power amplifier device cutting in and out due to a perceived overload or short situation on its output.
The power amplifier chip on our Warneck Amplifiers has a built in protection circuit inside that will cut off the output if it detects an overload or fault condition. It will then wait a short period of time (usually a little less than 1 second) and then "try again" to operate normally. If it senses the fault again, it will again cut out. This cycle will then repeat infinitely as long as the fault is present, producing the 'stuttering' you describe. This 'stuttering' action prevents the amplifier chip from overheating and burning out. The line out signal will be unaffected since its signal is taken ahead of the power amp stage on our amplifiers.
The issue here is whether or not there is actually a fault such as a bad speaker, pinched wire, or short somewhere in the speaker wiring. Sometimes a static discharge can cause the power device chip to fail prematurely, although this is extremely rare.
We suggest the following:
Hook a known good 8 ohm speaker (any will do, as long as it can handle 20W of power) *directly* to the amplifier's speaker output terminal, bypassing all of the internal speaker and headphone jack wiring in the piano. Then, test the piano.
If all operates normally using the external speaker, then one of your pianos speakers may have a short in it or your speaker wiring/headphone jack may be incorrectly connected or shorted. Verify that you see the appropriate load with a meter across the speaker wires (8 ohms, likely a bit less with a DC resistance measurement). Also check for shorts from the speaker leads to chassis- there should be NO continuity between either speaker lead and chassis ground in the piano when the speaker wires are disconnected from the amp.
#2
Wurlitzer Electric Piano's / SUPPORT: Have a Crackling, Pop...
Last post by RetroLinear - Dec 16, 2024, 07:31 PMThe Problem: You've installed a new Warneck Amplifier and the Wurlitzer's producing a crackling, popping, or almost synthesizer like noise which may be constant or comes and goes.
The Source
There is a 99.99% likelihood a short is present in the reedbar(s).
A further explanation on Wurlitzer pickup shorts;foreign material / debris caught between the reed and pickup. You'll notice the tolerance of space between the reed and pickup is very narrow. Any material caught in this gap will short the pickup causing pops, crackles, static! Sometimes when tuning a reed solder chards which may have not been fully shaved away by the file can break free from the reeds solder mass- creating a short.
How to resolve this issue
NOTE: Before continuing lets verify a valid electronic installation of your amplifier.
Simply disconnect the RCA pickup cable from your Warneck amplifier, turn on the piano, if you hear a pop noise and amplifier operating noise (minimal) The amps operating, and installed correctly.
Onto identifying and isolating shorts (This applies to both the EP200 & EP200A amplifiers)
On 200 series pianos shorts generally occur during the reed-bar shield installation process.
Our directions include a specific sequence of screws to remove to minimize this scenario however there is some extra wiggle room on the pickups themselves so mechanical shifting at this level may have created a short.
A simple visual inspection can generally produce a result in this case, using a flash light to cast light from underneath the reed can be a handy method to reveal/spot a short. Feeler gauges can also be used to gap and check reeds. Your looking for any contact of reed to pickup, and any foreign debris in this space.
Isolating shorts: (Applies to both the 200 & 200A)
To isolate an upper or lower reedbar short disconnect 1 half of the pickup cable, on model 200 pianos, this will be the hot terminal lug off pickup cable located between reedbars by your pianos damping mechanism. On model 200A pianos with a pre-amp RCA adapter board you can remove the upper or lower screw in the same location thend raise the mounting bracket so it doesn't make contact.
Following this procedure will run your piano with either the upper or lower disconnected, if you have sound the short is in the disconnected reedbar. If you have no sound in either, there's a short in both.
Mechanically cleaning shorts
Here's the official RetroLinear in-house procedure for quickly clearing shorts.
We have successfully executed this process at least a few hundred times over the 15 year span of our Wurlitzer Restorations- it works.
(this process starts with the piano lid off and the reed-bar shroud cover removed)
Step 1. Exposing the reeds. This can be done by connecting your sustain pedal and holding it down with your foot
Or by clamping the back center bracket of the pianos damper mechanism down to the tray with a large c-clamp or bar clamp. This elevates every damper for blasting
Step 2. With an air-blasting nozzle and an air compressor set to 75psi - blast the reeds/pickups from a distance of 6-8 inches. While blasting the reeds play all of the keys up and down the register and follow your key strikes with air blasting- back and forth. This will oscillate reeds (wildly) and displace any foreign debris causing your short.
Like all things Wurlitzer, if this didn't work the first time, repeat the process, and if it didn't work after that, try it again until it works..
You can also use feeler gauges to slide between the reeds- this is more tedious, and if your sloppy and not careful detuning a reed or messing up its voicing can occur so - we only advise this as a last ditch effort.
Compressed / Canned air doesn't have the horsepower to dislodge a short, save your $$
if you don't have a compressor but own a Wurlitzer - we suggest owning a compressor, these pianos are dust magnets, and also do not have sealed wooden surfaces internally, so debris tends to build up internally- keeping a Wurlitzer clean is optimal for good performance.
If you can't have a compressor, contact a local auto repair place, if they're down to earth, you can slip them a few bucks to blast your piano..
always be careful using compressors!!!!
#3
Wurlitzer Electric Piano's / WR-OB1 Wiring for EP200 & EP20...
Last post by RetroLinear - Dec 05, 2024, 02:11 PM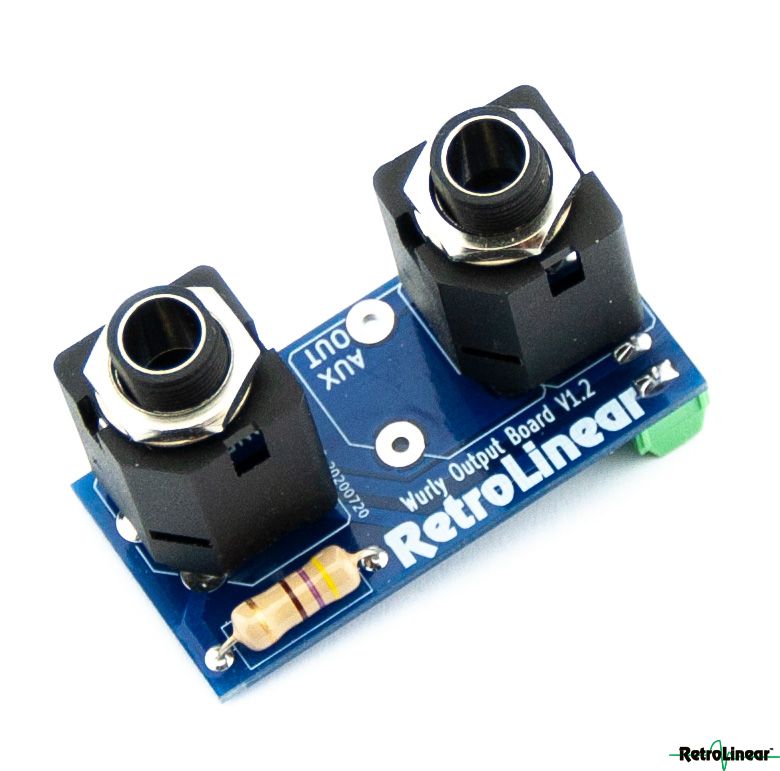
Universal installation document for our WR-OB1 output board.
This applies for both the EP200A and EP200.
WR_OB1_UNIVERSAL.pdf
#4
Rhodes Piano's / [Tech-Tip] Removing hammer-cam...
Last post by RetroLinear - Mar 28, 2024, 02:12 PMBe sure to do this work in a well ventilated area..
Materials needed:
• 90% iso alcohol
• CRC Non-Flammable Brakleen
• Microfiber towel
• Needle bottle or syringe
Materials needed:
• 90% iso alcohol
• CRC Non-Flammable Brakleen
• Microfiber towel
• Needle bottle or syringe
#5
Wurlitzer Electric Piano's / LED Power light mod for EP200 ...
Last post by RetroLinear - Dec 14, 2023, 09:09 PMLED On/Off pilot light install for Warneck Research Wurlitzer amplifiers
Models: EP-200, 200A & 140X
Difficulty level: basic soldering and hand tool skills required
Tools required:
• Soldering iron (recommended temperature controlled!)
• .032" diameter 63/37 Solder (included with kit)
• Diagonal wire cutters
• 13/64" drill bit & hand drill
• Optional: de-burring tool, larger bit or file to de-burr thru-hold
For the technically inclined materials
• 5MM LED
• 5.6-10K ½ watt resistor (less resistance = brighter led)
• 22-24ga stranded hookup cable
Or if you've purchased a pre-assembled kit, proceed as follows
Instructions:
1. Locate "Varivib" section on amplifier circuit board
2. Solder Black wire to black solder point
3. Solder Resistor/Red wire to red on varivib
(Note: don't bridge or jump pads with solder blobs!!
soldering iron temperature should not exceed 700° Fahrenheit, or 375°C)
4. Remove Neon bulb, cut brown wires from terminal strip with fuse.
(be careful not to cut fuse or transformer leads)
5. Drill 13/64" hole
6. Hot melt or crazy glue more than ample to hold LED inplace.
Model EP200 solder points


Model EP200A solder points


Models: EP-200, 200A & 140X
Difficulty level: basic soldering and hand tool skills required
Tools required:
• Soldering iron (recommended temperature controlled!)
• .032" diameter 63/37 Solder (included with kit)
• Diagonal wire cutters
• 13/64" drill bit & hand drill
• Optional: de-burring tool, larger bit or file to de-burr thru-hold
For the technically inclined materials
• 5MM LED
• 5.6-10K ½ watt resistor (less resistance = brighter led)
• 22-24ga stranded hookup cable
Or if you've purchased a pre-assembled kit, proceed as follows
Instructions:
1. Locate "Varivib" section on amplifier circuit board
2. Solder Black wire to black solder point
3. Solder Resistor/Red wire to red on varivib
(Note: don't bridge or jump pads with solder blobs!!
soldering iron temperature should not exceed 700° Fahrenheit, or 375°C)
4. Remove Neon bulb, cut brown wires from terminal strip with fuse.
(be careful not to cut fuse or transformer leads)
5. Drill 13/64" hole
6. Hot melt or crazy glue more than ample to hold LED inplace.
Model EP200 solder points
Model EP200A solder points
#6
Wurlitzer Electric Piano's / Warneck Research EP200A Downl...
Last post by RetroLinear - Dec 14, 2023, 09:04 PMWarneck Research EP200A Downloads
• Wiring Diagram (pdf)
• Step-by-step directions(pdf)
• 200A Pickup board(pdf)
• Wiring Diagram (pdf)
• Step-by-step directions(pdf)
• 200A Pickup board(pdf)
#7
All things pedals / MUpower installation info & Vi...
Last post by RetroLinear - Dec 14, 2023, 08:52 PMThe MUpower dc adapter is designed for Musitronics Mutron III pedals only. This is not compatible with Haz Labs Mutron III+ or later era ARP Produced Mutron III pedals. HazLabs units run on 24VDC and the Later ARP Mu-pedals are AC powered.
Current consumption is less than 50mA, Power requirement is 9VDC, CENTER NEGATIVE.
It is advised to directly power this pedal on a single adapter or single port directly on a multi-tapped supply ie:Strymon, Cioks, Voodoo labs.
Mupower requires direct power and ground to operate ideally. Note some brands of 2.1mm splitter y-cables lift ground on one side, so if your using daisy chains and or y-splitters this may potentially be the source of no-operation.
Step-by-step Installation
Tools Required:
• #2 Phillips screwdriver
• #1 Phillips screwdriver, or larger jewelers
• Wire-stripper with 22ga size
• Small diagonal cutters
Difficulty level: EASY
Remove the screws front, back, top, note the 2 screws on the rear near the old power jack stay.
With all screws removed, you can separate the chassis, if your Mutron III still has its battery door feed that thru the lower chassis half.
Take the diagonal cutters, and snip the RED,WHITE & BLACK wires on the old power jack.
Strip roughly 1/8" of jacketing back, twist each stripped wire tightly so there are no splinters that may make contact where it shouldnt.
Insert wires into terminal block as follows
RED wire to +9
BLACK wire to -9
WHITE wire to ground
mount the MUpower with the supplied screws, this can be a little tricky, its best to pop both screws in, slip the cover piece over and while holding the screw heads in place the dc-adapter board over, and quickly get the screwdriver on there and tighten up.
reassemble the pedal.
Its advised remove batteries when powering with DC.
FOR BATTERY OPERATION - please contact support@retrolinear.com
Some Mutron III tips for ideal operation:
• Clean pots, switches with CRC 2-26 cleaner/lube, use a light amount - do not overspray
• Make sure the Rotary switch and control pots are tightly mounted to the chassis (1/2" SOCKET)
• Make sure the output/input jacks are also tight, there should be a lockwasher inside, flat on the outside.
• All missing hardware should be replaced, especially the large #8 rear screw which supports the PCB.
#8
Wurlitzer Electric Piano's / 200 / 200A Series VariVib Down...
Last post by RetroLinear - Dec 13, 2023, 05:06 PM
#9
Rhodes Piano's / Rhodes MKI 73 & 88 Stage Piano...
Last post by RetroLinear - Dec 08, 2023, 02:52 PMThe "ideal" wiring harness for all Rhodes MK.I 73 & 88 stage pianos.
This tone-stack provides a broader response in tone.
View
This tone-stack provides a broader response in tone.
View
#10
Wurlitzer Electric Piano's / Warneck Research EP200 Install...
Last post by RetroLinear - Dec 08, 2023, 02:47 PMComplete install video including: EP200 Amplifier, shielding tube kit, VariVib Variable speed vibrato and WR-OB1 output board. For additional tech support please email: support@retrolinear.com

Downloads:
• Step-by-step directions (pdf)

• ColorWiring Diagram (pdf)

Youtube
Downloads:
• Step-by-step directions (pdf)
• ColorWiring Diagram (pdf)
Pages1